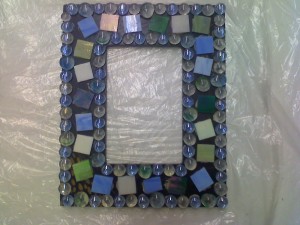
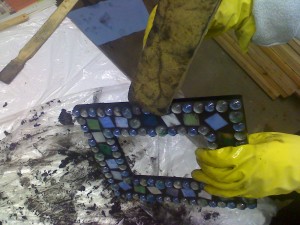
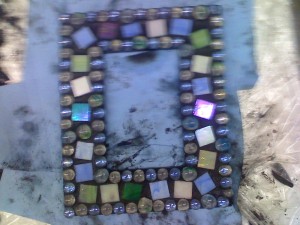
Okay; so; we left off in Chapter One with having all your supplies, tools, and mosaic items you want to grout ready and waiting. Now, I’ll show you step by step, in pictures, my grouting process for a mosaic frame. As you can see, in this first picture, we have a frame that I have glued mosaic pieces on (yes; there will be future posts about mosaic materials and different glues/adhesives), including glass gems and stained glass pieces. I have waited at least 24 hours for the adhesive to cure correctly and am ready to apply my grout.
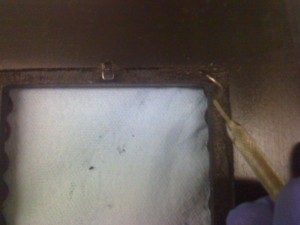
OH! One last thing; I keep making this mistake over and over again, so I don’t want you to do the same…if you are grouting something that has areas you don’t want to get grout and/or water in, like a frame like this that has those grooves all around the photo opening area for the glass/photo/easel, like I do, you need to TAPE OFF those groove areas. Use painter’s tape and tape off any areas that you don’t want grout getting into. You don’t need to worry about taping off, say, the sides and back, just the little nooks & crannies where you will have to dig the grout out of later so that you can insert your glass and photo. I have found that with painted surfaces on sides or backs or bottoms of pieces, it’s a waste of time to tape them off; the grout usually comes off fine during the grouting process, and, if it scratches the painted surfaces, I can always paint over it. If you’re working with a mirror, the best advice I can give is to apply some clear contact paper over the mirror before you begin grouting, so that it doesn’t get scratched (from the SANDED grout). It’s a good idea, much as it is in painting, to remove all film (contact paper) and tape before your piece has completely dried; like after you do the buffing step. The picture you see below, ‘for your viewing pleasure’, is the bain of my existence; my consistent failure to tape off the grooves in frames and then have to take one of my ‘dental pick’ type tools and scrape & then wipe it all out. I WILL be making myself a big ‘ol sign in the future so I can LEARN to stop doing that!!!
First; a word about GROUT: I always use SANDED grout, because non-sanded grout is only good for very, very small grout lines (the areas between your materials that will be filled with grout). Beware; do NOT use pre-mixed grout, as I explained in “Chapter One” of Grouting. Also, beware; if you see grout at many craft stores (Hobby Lobby, Michaels, etc.), be sure to really check to see if it’s sanded or non-sanded. No matter if they only carry non-sanded or not (like many do), do NOT buy the non-sanded. I think the best place to buy your grout is from Home Depot or Lowe’s. (If you want some higher quality stuff for something fancy or super-durable for outdoors or more colors choices, go to World of Tile, Broadway Tile, or maybe Tile for Less.) They have large selections and low prices. I would recommend the smallest size box for most crafters to start with. Another great option is to go to a Habitat for Humanity Re-Sale store if you have one you can access. They often get donations of discontinued grout colors that are perfectly fine for what we do, but just being changed out b/c manufacturers always think they need some fancy new color name each season for their products. Another option, if you have a business license, is to get an account set-up at a local tile manufacturer or distributor (say, Interceramic or Dal-Tile in Denver) and buy the grout at wholesale prices, which provides another great discount. I have not looked into buying grout online, mostly because it’s easily accessible and affordable for me in Denver and I would imagine its weight would be cost prohibitive for shipping.
As referred to in the materials and supplies set-up in “Chapter One”, I’ll have my work surface covered with a plastic, disposable dropcloth. Before I grout, I use old newspapers several thick as a grouting surface on top of my plastic. This is so that, when you get done with the messiness of the initial grouting and water, you can dispose of the news papers and use a new stack of newspapers to have a cleaner surface for your mosaic, so that you aren’t having your pretty new piece sitting in a bed of muck. The first thing I’m going to do, before even touching my grout package, is to put on my disposable, thin, tight-fitting latex or non-latex gloves. (Believe me, grout is extremely drying to the hands; you don’t want to learn the hard way!) Next, I put on my face air mask before I pour and mix the grout (this is the time when you will have the most exposure to the toxicity of grout dust; again; don’t learn the hard way!) After I’m all “geared up”, I mix up my grout; I usually do so in a small, throw-away or reusable (and recycled) plastic container, like a Cool Whip container or old bowl. You can mix your grout according to package directions; it will tell you how much to use w/ how much water for whatever size space you need to cover. The recommended consistency and thickness of mixed, sanded grout varies from one book or artist to another; I have found that I agree with the “mix it almost as thick as frosting” direction. I also support letting it “slake” like they talk about on the grout pkg.; this is when you wait 10-15 minutes after mixing the grout to begin using the mixture, so it has time to chemically react and kind of “set up”. Some people say this isn’t necessary and they don’t do it, but I’ve found it to provide a better finished product.
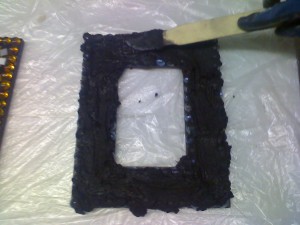
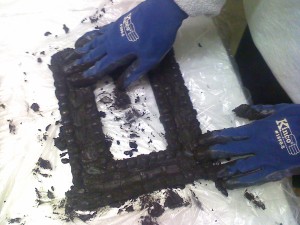
Next, I put on my fabric and rubber “nitrile” type gloves so that, when I’m working the grout into my mosaic, I don’t get grout or water onto my hands or, most of all, cut myself. I take small blobs of grout and apply them to my piece with one of the wooden paint stirrers, or just dump a majority of the grout onto the piece, depending on the project. Next, I work the grout into the piece and the different grout lines with my gloved hands. I smoosh in as much grout as I can into every nook and crannie, making sure to work from all angles; side to side, up and down, and in circles. By “smooshing”, I mean working it in with the different directions, but NOT just pushing it into the grout lines and open areas. When you push the grout in or try to “pack” it in, you’ll get air pockets. So, be sure to just work it in w/ circular and vertical and horizontal hand motions. At this point, you are trying to really work the grout into every blank space so that there are no areas without grout or air bubbles in your finished product.
This is a good time to move aside some of the ‘gucky’ stuff you’ve used for grouting thus far and make sure that you don’t have grout hardening on any and everything. Take your stirrer stick and scrape any excess grout out of your grout mixing container into the garbage –or—throw away the grout container with grout if you’re not going to reuse the container. Clean your stirrer stick off as much as possible with paper towels that you throw away, then soak it in your “dump” bucket to use next time. Since my hands/gloves are really covered with grout and I don’t want to transfer any more grout onto my piece in the next step, I carefully remove that outer pair of rubberized/textured gloves (leaving on the inner pair of latex, tight-fitting gloves) by putting them in my big “dump” bucket of water and rubbing them together to get all the excess grout off them, and leaving them to soak. Often, if I have time, I let the worked-in grout sit on the piece for maybe 15 minutes or so before wiping any off with the sponge.
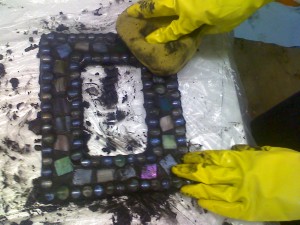
Next, I put on the yellow/dishwashing/long rubber gloves over my thin latex gloves; these will provide clean ‘tools’ to clean the excess grout off your mosaic piece, but are thicker than just the thin inner gloves. The next thing you’re going to do is take your grout sponge and get it soaked in water, ringing it out almost all the way, but leaving a fair amount of water in it. I have found that I follow a system of using the water to really work the grout into the piece more, rather than being afraid of having too much water added to the grout at this point. Some books or artists will tell you to not use anything wet or use a barely wet sponge, but I learned from those that use water in this step, and I think it works out best. I’m not talking about having so much water come from your sponge that there are pools of it on the piece, but, enough to not be wiping grout off yet; just working it in still. When my sponge gets really thick with grout, I rinse it out in my grout bucket. As I do several “working in” sessions with
the sponge and grout, I will have less and less grout on the piece and will ring my sponge out more and more. The object here is to not wipe too much grout off of your piece. You want to make it so that your grout is even with the top of your materials (your tiles or whatever). If you have materials that are of uneven heights, like I often do with my glass gems, tiles, beads, etc., I usually just follow a rule of making the grout height be the same as the lowest level material, like, if the tiles are a lower height than the glass gems, I wipe the glass gems off enough to be level with the top of the tiles, where the grout meets up. The easiest instance of grouting is when you have completely uniform material heights, like when you use tiles that are all exactly the same height; your grouting job is much, much easier! (I will talk about varying heights in making mosaics in future posts.) If you don’t understand what I’m saying here, please post a question or send me an email and I can clarify more.
If you have edges on your piece that don’t have mosaic on them (which you most often will), you will also want to take your sponge and run it along the edges to clear any excess grout. You’ll also want to go over the back of the piece or bottom, or any other non-mosaic’d sides to wipe off any and all grout. After I’ve cleaned off all the excess, I carefully lift up my mosaic piece and discard the top layer of my grout-covered, wet, blobby stack of newspapers and throw them away. I then have a lower-layer of ‘clean’ newspapers or paper towel to set my nice mosaic piece on, so excess grout and water can’t do any damage to all my hard work. (Know that whatever grout you leave on after this process is almost always NOT going to come off. Grout is basically cement; it is a real pain to get off any excess after your beautiful piece is finished and dried. )
At this point, your piece will be almost free of excess grout, but it will have a little bit of what they call “grout haze” left on it. It will show more and more as the piece becomes drier, but we will wipe that off in an upcoming step; don’t worry about it now. Do NOT keep wiping off your piece w/ the sponge a million times; just a few clean swipes is all it takes to have your grout at the desired height and any excess gone from the piece.
Sit your grouted mosaic piece on another clean and dry set of newspapers or paper towels. Put your grout sponge in your “dump” bucket to soak. If you can, immediately rinse off everything in your dump bucket really thoroughly and sit it somewhere to dry. You want to try to get any and all excess grout off of your gloves, tools, and sponges; the longer it is in/on them, the harder it gets to get off. If you can’t do the thorough rinsing now, make sure they are at least soaking in the ‘dump’ bucket. Take off your rubber “dishwashing” gloves and rinse them and sit them to dry.
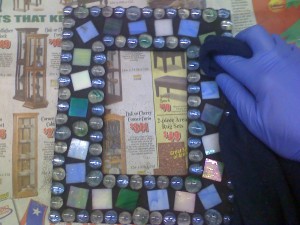
Now you’ll want to let your piece sit for about 1 hour before taking one of your clean cloth rags and buffing the excess grout haze off of it. If you start buffing/removing the grout haze and you see that your rag is gouging into the grout on the piece, then that means it is too wet to buff. Wait another 1-2 hours to try to buff off the haze again. When your piece is ready, just wipe excess haze off the pieces and look for any bits of remaining grout that aren’t where you want them to be, like on the edges or on some of your materials, like, say, glass gems. If there is excess grout or adhesive showing through, I use my ‘dental pick’ type tools to scrape it off while it hasn’t hardened beyond the point of no return. I especially like the kind of pick that has an exacto-type blade at one end and a curved/c-shaped blade on the other end; the curved blade works really well for getting excess grout off all kinds of spots. Remember; the cloth rag that you use for buffing can NOT be put in a washing machine; you will just have to re-use it until it gets mucked up beyond use and either throw it away, or you can wash it outside in a bucket and then wash it inyour washing machine.
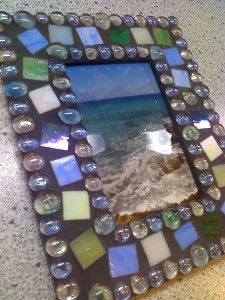
Finally, let your piece sit for at least 24 hours after buffing to dry thoroughly before doing anything else to it. You can wait as long as you want, but, after you’ve waited the minimum 24 hours, you can seal your piece (however, I would say 72 hours or more is optimal). Before sealing, use glass cleaner to add an extra shine to the piece. ALWAYS spray the cleaner on a paper towel and not directly on the piece. Use the wet paper towel to clean up and shine any of the materials, but not the grout (you are shining the tesserae, or materials, not the grout). For sealer, you can use any grout sealer found in a craft, home improvement, tile, or flooring store. However, I think you get a much better deal if you purchase it at a home improvement store. I prefer those that completely waterproof the piece, even if it’s not for outdoor use or a water-based feature, just to have the most protection. I’ve now found that I like the sealers that come in a sprayer, or that I can pour into a generic sealer, or the kind that come in a bottle with a little brush on the end. If you just have a big jug, pour your sealer into a recycled jar or bowl and then use a sponge or regular paint brush (of low quality; you’ll need to throw it away at some point) to work the sealer into all the grouted areas (you are sealing the grout, not the other materials). As soon as you get it all worked in, use a lint-free (and, again, reusable and/or disposable) cloth to wipe off all excess sealer. The biggest thing to watch for at this point is to not leave any sealer on your materials (tiles, glass, etc.). You may not realize it at first, but the sealer can easily leave a super-thin layer of film on your materials that will make them look dull. If this happens and it dries, your only recourse is to carefully use steel wool or a nasty chemical concoction to scrape off the film; NOT a fun proposition! So; just get that sealer wiped off really good, right away, working in good light so that you can see that you got it all. If you still need to add a wire hanger, hooks, a frame, or additional charms or embellishments, do so after the sealer has dried, usually a minimum of about 4-6 hours. And, after all that, you will have what I think is a beautiful mosaic piece…
In my next installment, I will talk about what to do with your mucked-up grouting area and your grout buckets and water; there are definitely ‘good’ and ‘bad’ ways of dealing with these lovely items. In the meantime, please let me know of any questions, clarifications, or suggestions you might have by posting to the blog or sending me an email!

